HI GUYS,
I got something for the masses lol' dressing up your house for the holidays are always a tradition in the caribbean. And its my DIY duty to help you out, so check out this cool tutorial from houseofhepworths on how to make your own curtains. A fun and exciting way to spice up your home for the holidays. Be sure to check out the link below for more cool ways to spice up your home. And make sure you stay tune for more from DIYers. Peace and blessed luv.
http://www.houseofhepworths.com/2011/10/12/how-to-make-professional-lined-curtain-panels/
How to make professional lined curtain panels
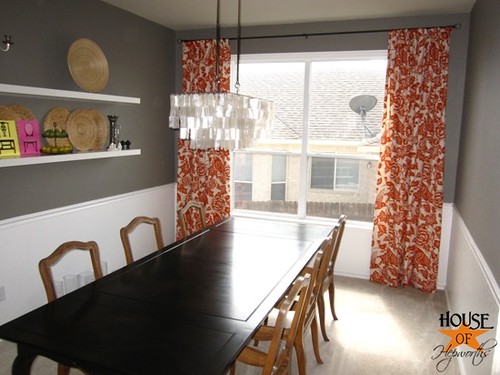
This is my 3rd and final post about my awesome Aviary curtains. You can also go back and read about the curtains and learn how to make your own custom curtain rod.Have you wanted to sew your own curtains, but you have no clue where to start? Does making your own curtains intimidate you? Does the thought of sewing your own lined curtains freak you out?
Before a few weeks ago I answered YES to all three questions. However, now I can say that I’ve made my own lined curtains, and I survived! And now I’m going to show you how to make your own too.

I’ve got loads of photos (too many probably!) so hopefully you’ll see just how easy it really is to sew your own curtains.
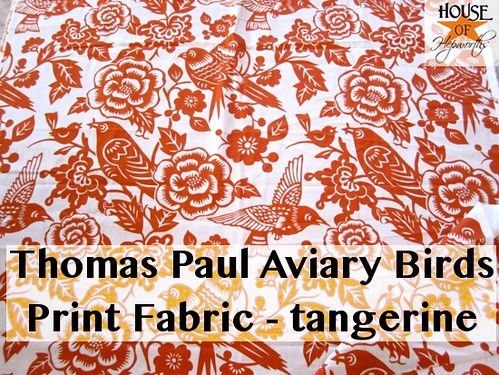
Here’s the fabric I used:
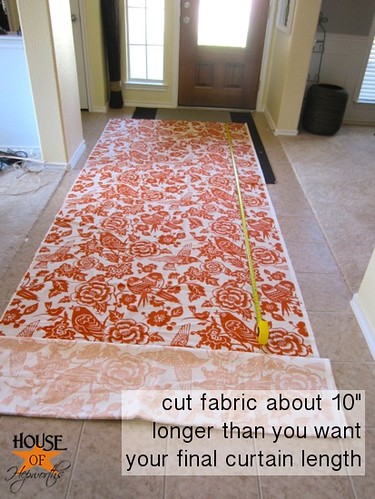
To start, spread your fabric out on a large flat surface (the {clean} floor works great), measure it, and cut each panel about 10″ longer than you’d like your curtains.
Once your fabric is cut, it’s time to iron!
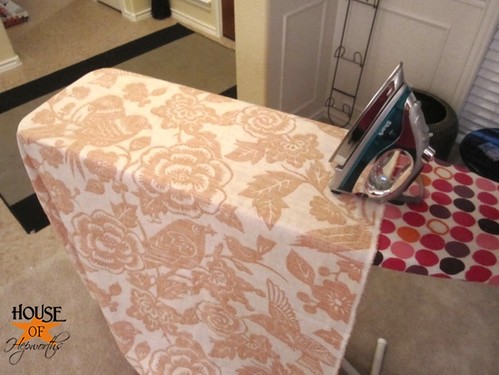
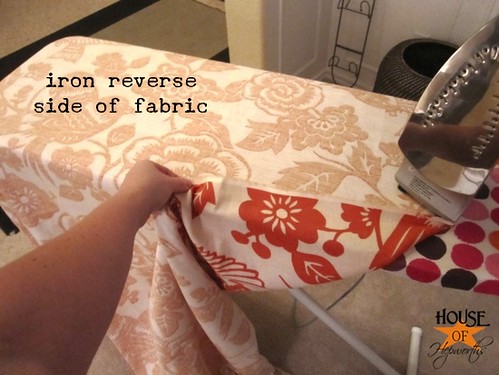
I ironed the reverse of the fabric just to be safe. I didn’t want my iron freaking out on me or anything and ruining my fabric. That would suck hard core.
If you don’t like to iron, you might as well give up now. You will do more ironing than sewing!
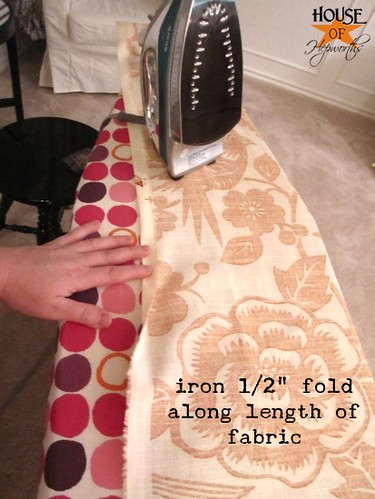
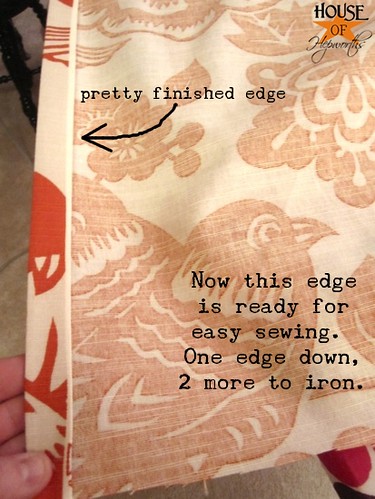
I ironed the entire curtain panel first, then I ironed both of the length-wise edges (sides). It’s much easier to sew the panels if the seams are completely ironed first.
To iron the edge, fold the raw edge over about 1/2″ and press. Do this down the entire edge of the fabric.
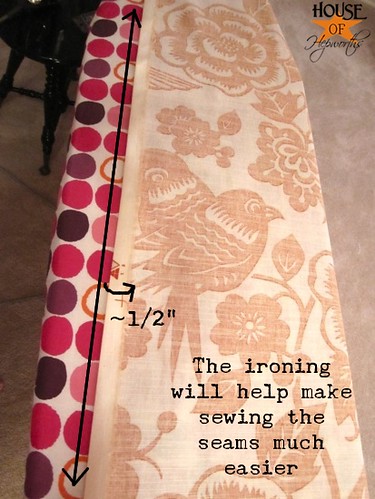
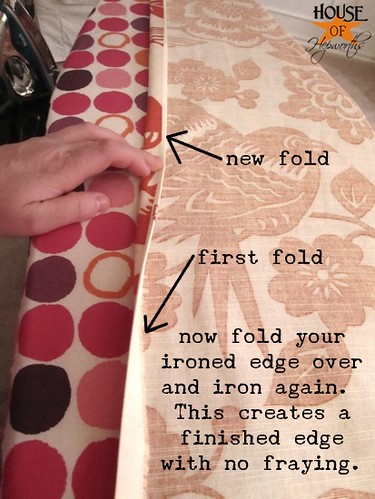
Once your edge is ironed, fold it over again and iron a 2nd time. This is your finished edge that you will sew in a few minutes.
Once your edge is ironed, you’ll need to iron the opposite edge as well.
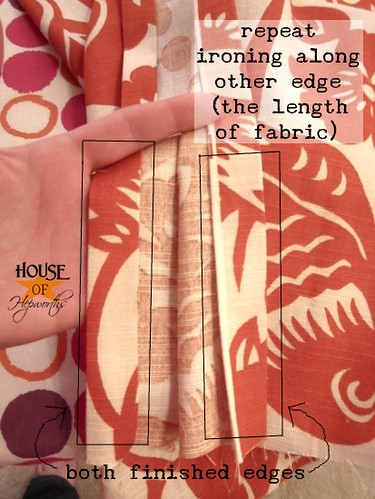
Both edges should now be ironed about 1/2″, then folded over and ironed about a 1/2″ again to create a finished edge.
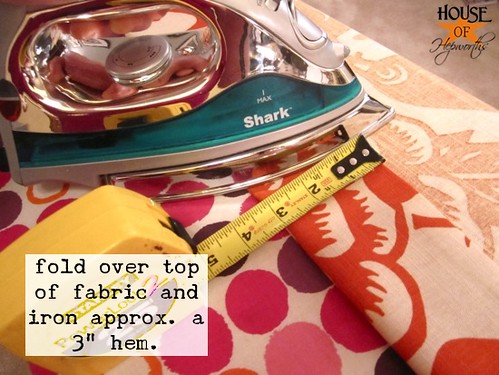
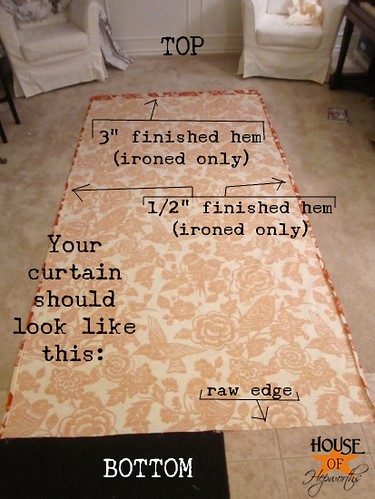
Now iron the TOP of the curtain fabric about 1/2″ over.
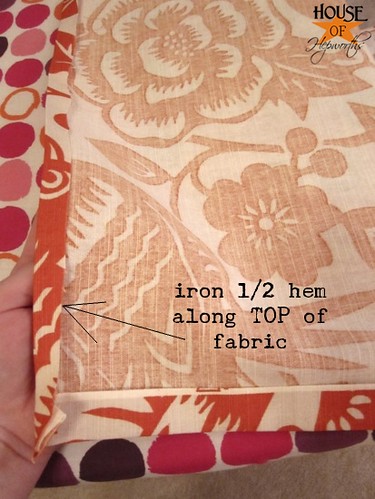
Instead of folding it over a 2nd time and ironing a 1/2″, this time fold over and iron about 3″. This is creating the finished edge of the top of the curtain.
You should now have 3 edges ironed over (twice each) and the bottom edge of the fabric left untouched.
From here, leave your curtain fabric alone. We will now prep the fabric for the lining of the curtain.
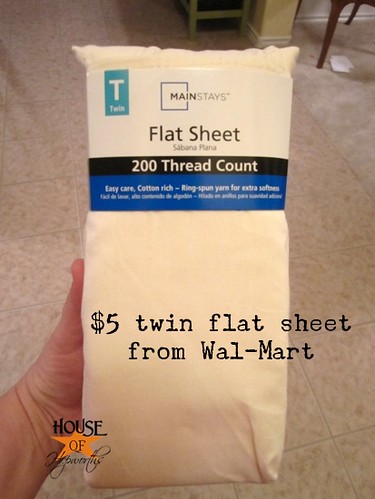
I wanted a cheap solution for the lining, but that was also good quality. My solution? Cream colored twin top sheets from Wal-Mart. They are $5 each, and I bought two packages – one for each curtain panel. They are the perfect length, and just a tad too wide. They are a great alternative to curtain lining fabric and come in a wide variety of colors.
I didn’t pre-wash the curtain fabric or the sheets. If I ever need to wash them, I will hang them to dry to prevent shrinkage.
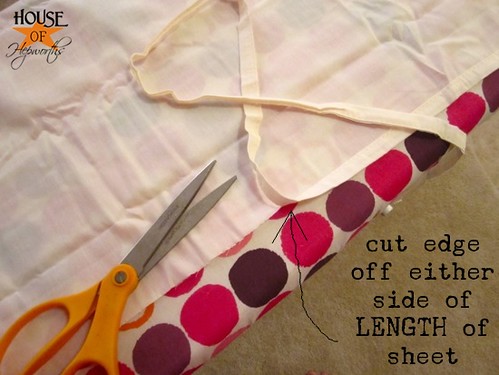
First step to prepping the sheet (curtain lining), cut the hem off of both long edges of the sheet and the bottom edge.
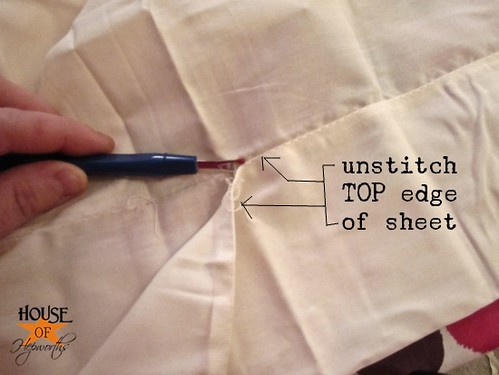
Now un-stitch the top edge of the sheet.
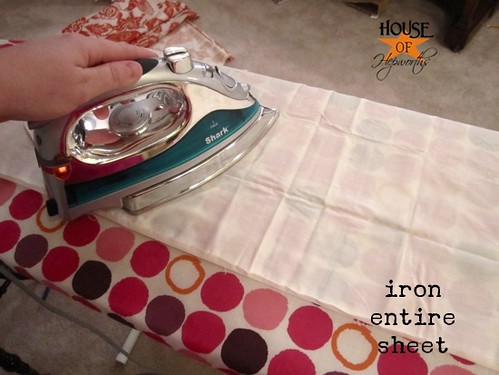
Lucky you… more ironing! Iron the entire top sheet once the top edge is un-stitched and the other 3 edges are cut off.
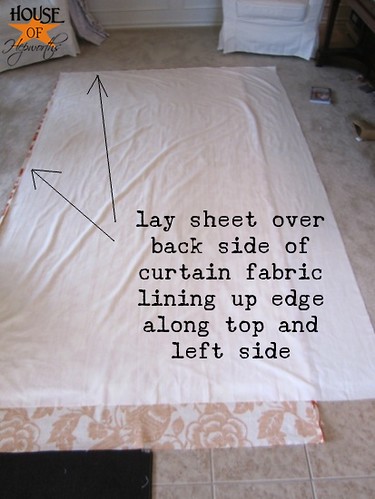
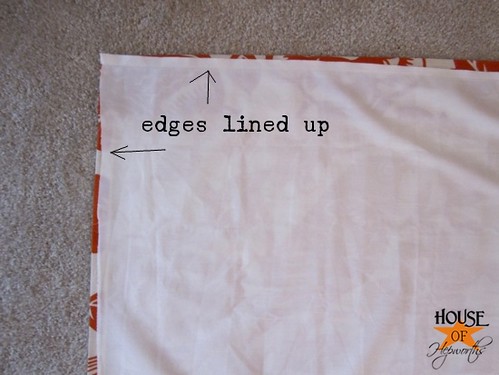
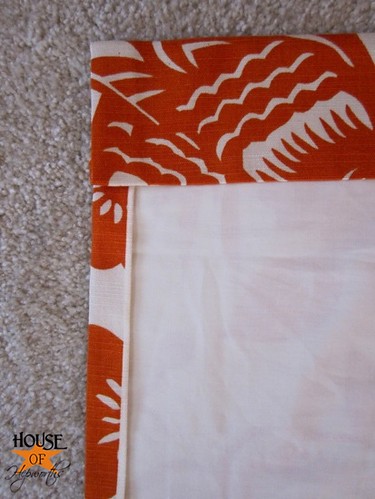
Lay your sheet over the top of the reverse side of your curtain fabric making sure the top and left edge are lined up perfectly with the edge of the curtain fabric. (I am a leftie, so my tutorial is made for left-handed people. If you feel comfortable, you may want to line up the right side first. Otherwise, just stick to the left-handed instructions.)
Slowly tuck the edge of the sheet under your ironed edge on the curtain fabric. Tuck only the top and left side. Don’t worry about the right side or the fact that the sheet is too wide for your curtain.
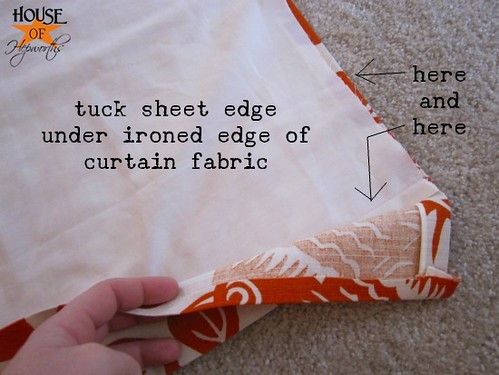
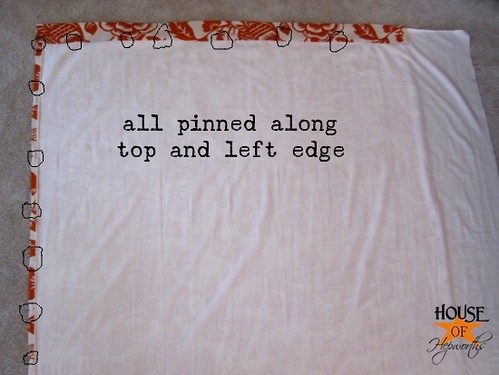
Your top and left edges will now look like this:
Pretty, hua?! Lookin’ good so far!
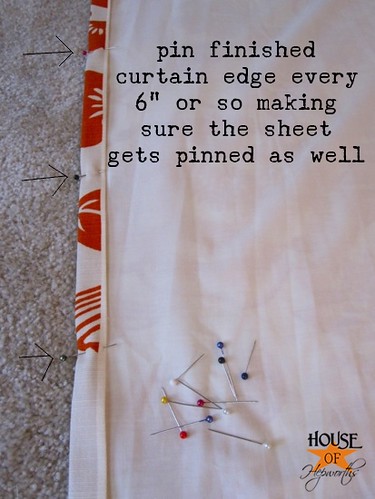
Work your way along the top and left-side edges and pin them every 6″ or so. Make sure your pin attaches to the curtain inside the pleat as well.
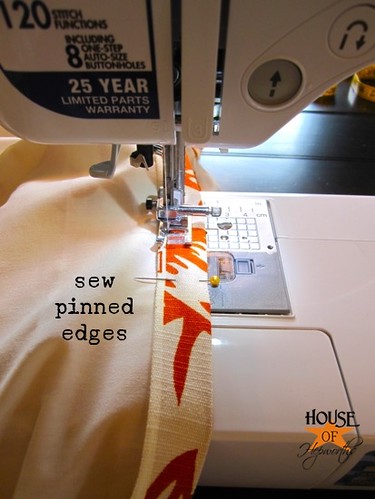
Now {finally!} it’s time to sew! Don’t be intimidated by this step. You are only sewing a straight stitch. No curves or anything!
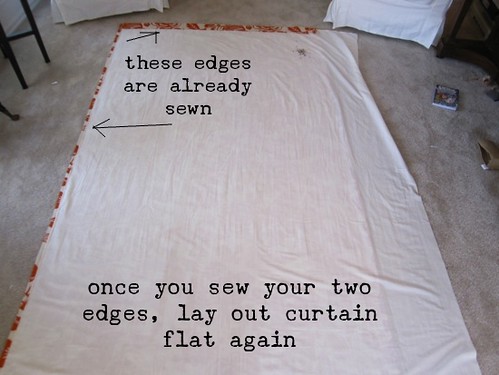
Sew along the pinned edges, removing your pins as you go. Sew about an 1/8″ from your inner seam on each edge. This will leave an almost 3″ gap when you sew along the top of your curtain but that is okay. You can even use that pocket to stick the curtain rod through if you choose to hang them that way instead of with curtain clips.
When you have both edges sewn, lay your fabric out on the floor again paying close attention to getting your sheet and fabric both as smooth and flat as possible.
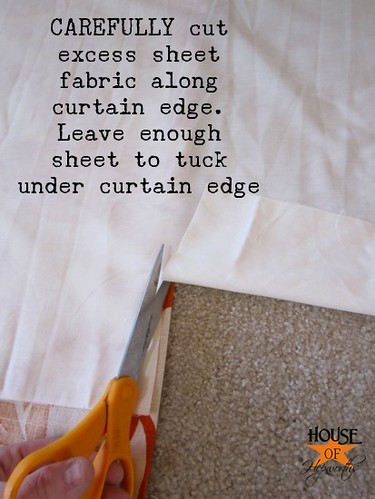
From here you need to remove the excess sheet fabric along the right side of your panel. Carefully cut it along the curtain edge making sure to not cut your curtain fabric. Also, don’t cut it too narrow. The sheet needs to be long enough to tuck inside your curtain seam.
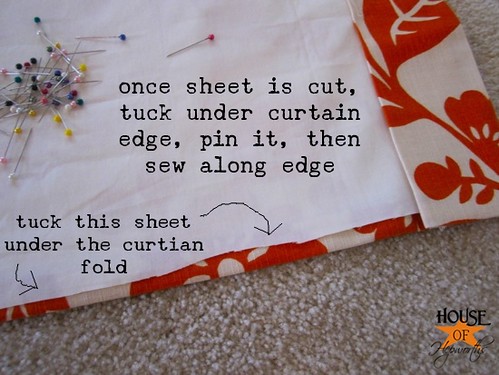
Once the sheet is completely cut up the right side, you will do as you did on the other edges – tuck the curtain under the pre-ironed curtain seam, pin it all the way down the edge, and then sew it.
You are *almost* done now! Yippie! Your curtain is ready for hanging (you will figure out the bottom hem in a minute. I didn’t forget.)
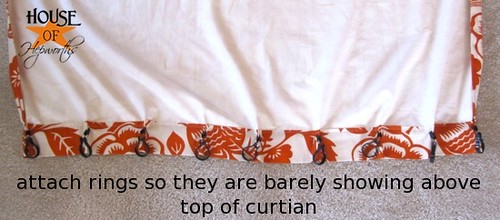
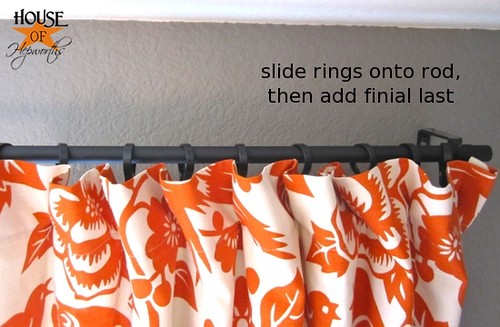
Attach your clips to the top edge of your curtain and hang it. To see how to hang your curtain with faux Pinch Pleats, follow this tutorial.
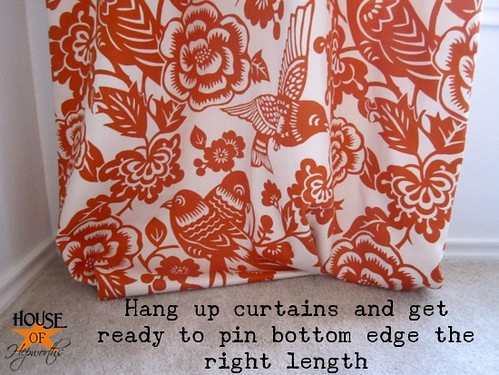
If you want your curtains to be exactly touching the floor, you’ll probably want to hem them while they are hanging to make sure your measurements are exact.
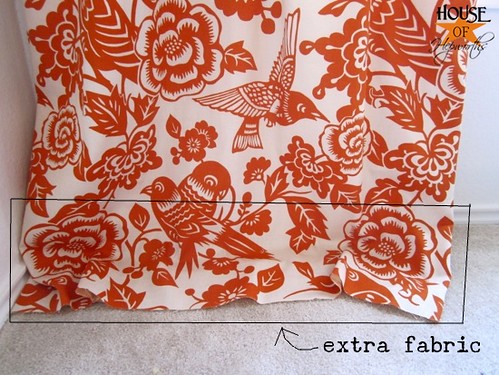
First, figure out how much extra fabric you have.
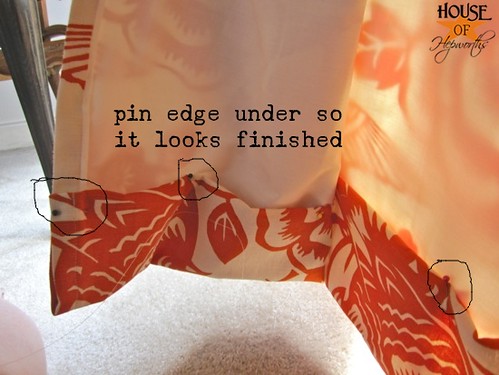
While sitting on the floor, take your time putting pins in along the fabric bottom (on the front of the fabric is easier) to mark where you want the bottom edge of your curtain to fall.
Once you have the front of your fabric pinned it’s much easier to pull the fabric away from the wall and properly pin your fabric for hemming. Make sure to tuck the raw edge under so it doesn’t fray and also keeps it looking pretty and professional.
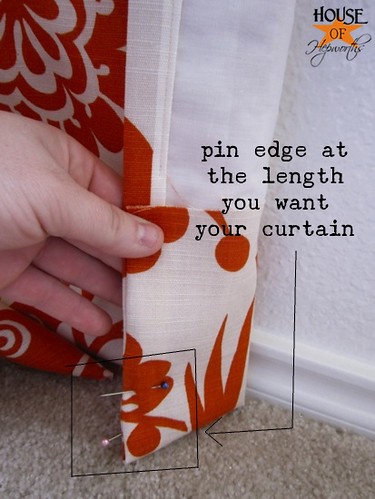
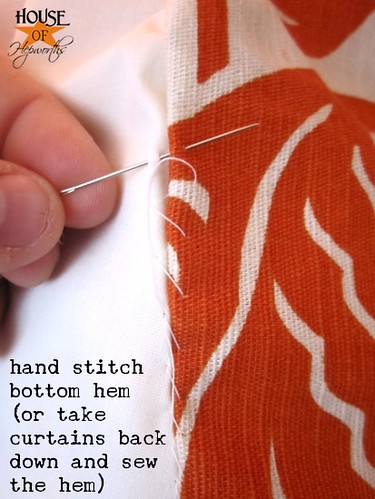
After you have checked and rechecked your curtain to make sure it’s the perfect length (you may have to tweak it a few times), you can now hem them. I chose to hem them while they were hanging for two reasons: 1) I was lazy and didn’t want to take them down again, and 2) if you hand hem them you don’t see as much stitching across the front.
You can totally just take the curtains back down though and hem them across the edge like you did on your top hem.
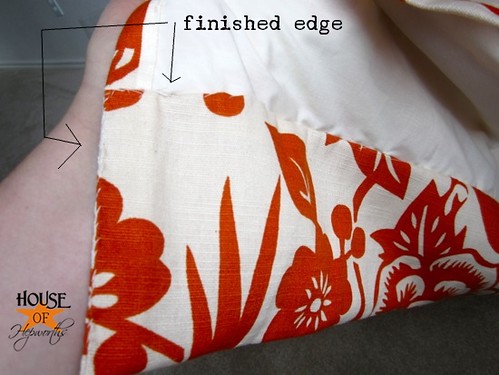
I ended up sewing down the entire edge on the side of the curtain as well because it was kind of gaping open. Here is the finished bottom hem.
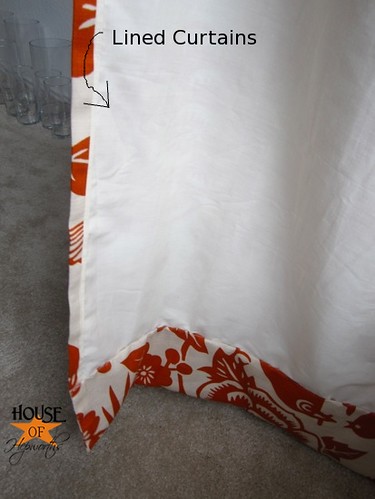
You have officially sewn a completely lined, professional quality curtain panel! Now get busy making the 2nd one.
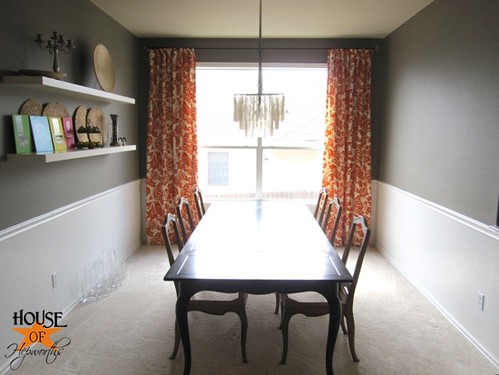
This completes my 3-part series on my Aviary curtains. I hope you learned a lot in the process. If you end up making curtains, I’d love to hear all about them!
No comments:
Post a Comment